Project Setup
This page has the instructions that you'll need to follow to set up your environment for Projects 1-3.
For your convenience, the CS 6324 staff has prepared two servers that you will have to deal with:
Project server: csa-chk22b.utdallas.edu
GitLab server: http://s3lab.utdallas.edu
Connect to the VPN
Both the project and GitLab servers are only accessible from within UTD's internal network. If you are outside the UTD campus, follow the instructions here to install and connect to the UTD VPN before proceeding to the next step.
Login to the project server
The project server provides a Linux environment with all required tools installed and pre-configured, and you can get access to those tools by following the steps below.
Connect to the project server.
On Linux/MacOS, running the following command will let you connect to the server:
[host] $ ssh NetID@csa-chk22b.utdallas.edu
e.g., my NetID is cxk200010, then,
[host] $ ssh cxk200010@csa-chk22b.utdallas.edu
On Windows, you may connect to server through your SSH client, but we highly recommend you to use Windows Subsystem for Linux (WSL), which can run a Linux distribution on top of Windows 10. You can find more information about installing and enabling WSL at here (We recommend installing Ubuntu).
Your initial temporary password should have been sent/announced to you by the CS 6324 staff. When you login for the first time, the system will require you to change your password. Make sure to use a strong password (at least 12 characters long, use uppercase and lowercase letters, numbers and special symbols).
You may setup ssh public/private key pair to log on to the server w/o typing password. If you would like to do so, please follow the instruction in the next step.
Creating an SSH key
If you already have your SSH public/private key pair, then you do not need to follow this step. What you need is just preparing id_rsa.pub or id_ecdsa.pub, etc., to register your public key to the server.
If you do not have one, please run the following command in the project server:
$ ssh-keygen -t ecdsa
Generating public/private ecdsa key pair.
Enter file in which to save the key (/home/cxk200010/.ssh/id_ecdsa):
Enter passphrase (empty for no passphrase):
Enter same passphrase again:
Your identification has been saved in /home/cxk200010/.ssh/id_ecdsa.
Your public key has been saved in /home/cxk200010/.ssh/id_ecdsa.pub.
The key fingerprint is:
SHA256:WDijyTgH9drAraogKkpB36rqea2S8WUf93C5NAFeDWY cxk200010@utdallas.edu
The key's randomart image is:
+---[ECDSA 256]---+
|    .      Eo    |
|   o o . .o. .   |
| .. o * o o      |
|. .+.B = . .     |
| .o.B.o S   o    |
| ..+.o . o =     |
|o.=.+ . o = o    |
|*+oo . .   o     |
|X+o..            |
+----[SHA256]-----+
After running this, you may find id_ecdsa.pub from ~/.ssh or your specified directory.
$ cat ~/.ssh/id_ecdsa.pub
ecdsa-sha2-nistp256 AAAAE2VjZHNhLXNoYTItbmlzdHAyNTYAAAAIbmlzdHAyNTYAAABBBFRxlq/fIouV7KflGVEwL04/yIprKdtf9KYOHk8gAbtIxocFFsAgBuEzRg4EtjQEYnitroSm2F14mHy2cz27+ho= cxk200010@utdallas.edu
Copy the text starts with ssh-rsa or ecdsa-sha2-nistp256 (the entire text), and use the text to register your public key to GitLab.
CS 6324 GitLab registration
We will use a private GitLab server to collect all your project submissions. Note that this GitLab, operated in-house at UTD, is different from the regular GitLab you may access at https://gitlab.com.
Use a web browser to visit http://s3lab.utdallas.edu and sign in. When you sign in, use your NetID as your username.
Your initial temporary password for the GitLab server should have been sent/announced to you by the CS 6324 staff along with the project server password.
When you sign in to the GitLab server for the first time, please change your temporary password manually.
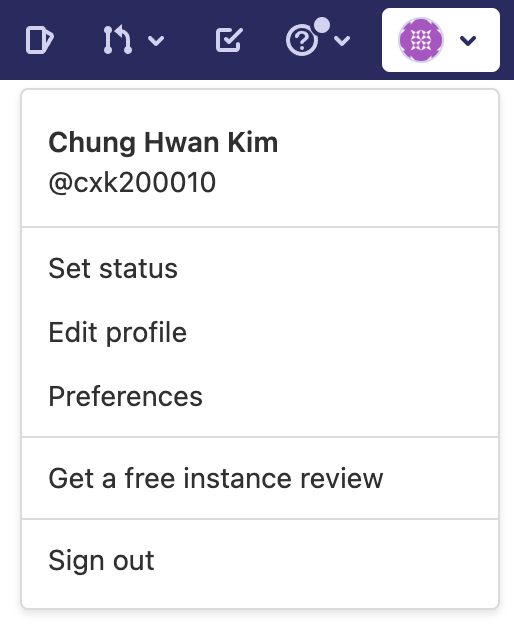
Click the circle at the top-right, and click 'Edit profile'.

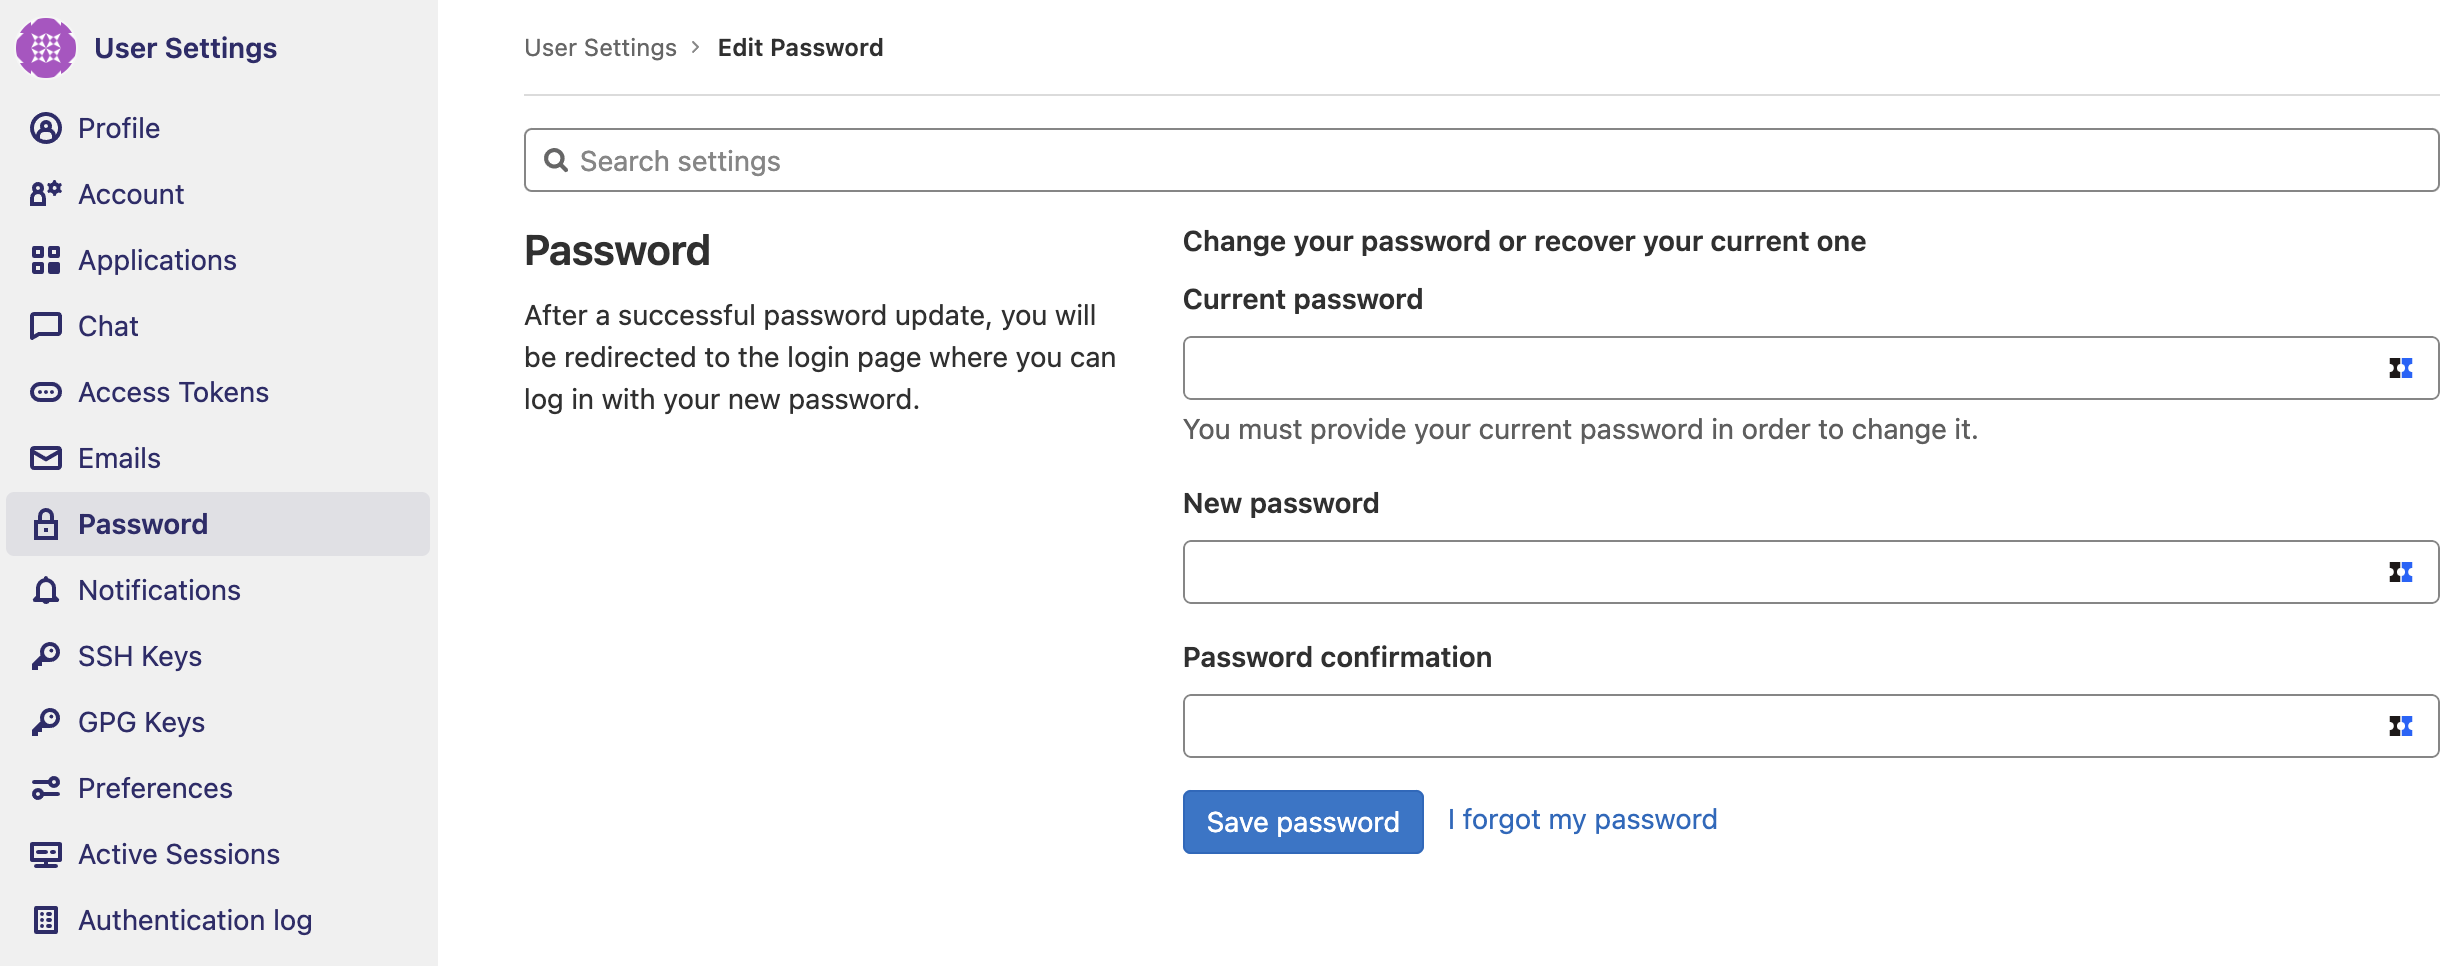
To change the password, click Password from the settings menu on the left.
Your passwords in the project and GitLab servers are NOT automatically synchronized. Thus, it is possible to use different passwords for the two servers if you prefer that. But I recommend using the same password for both servers to avoid potential confusion.
Enter your temporary password in the 'Current password' field and your new password in the 'New password' and 'Password confirmation' fields. Make sure to use a strong password (at least 12 characters long, use uppercase and lowercase letters, numbers and special symbols). After that, click the 'Save password' button.

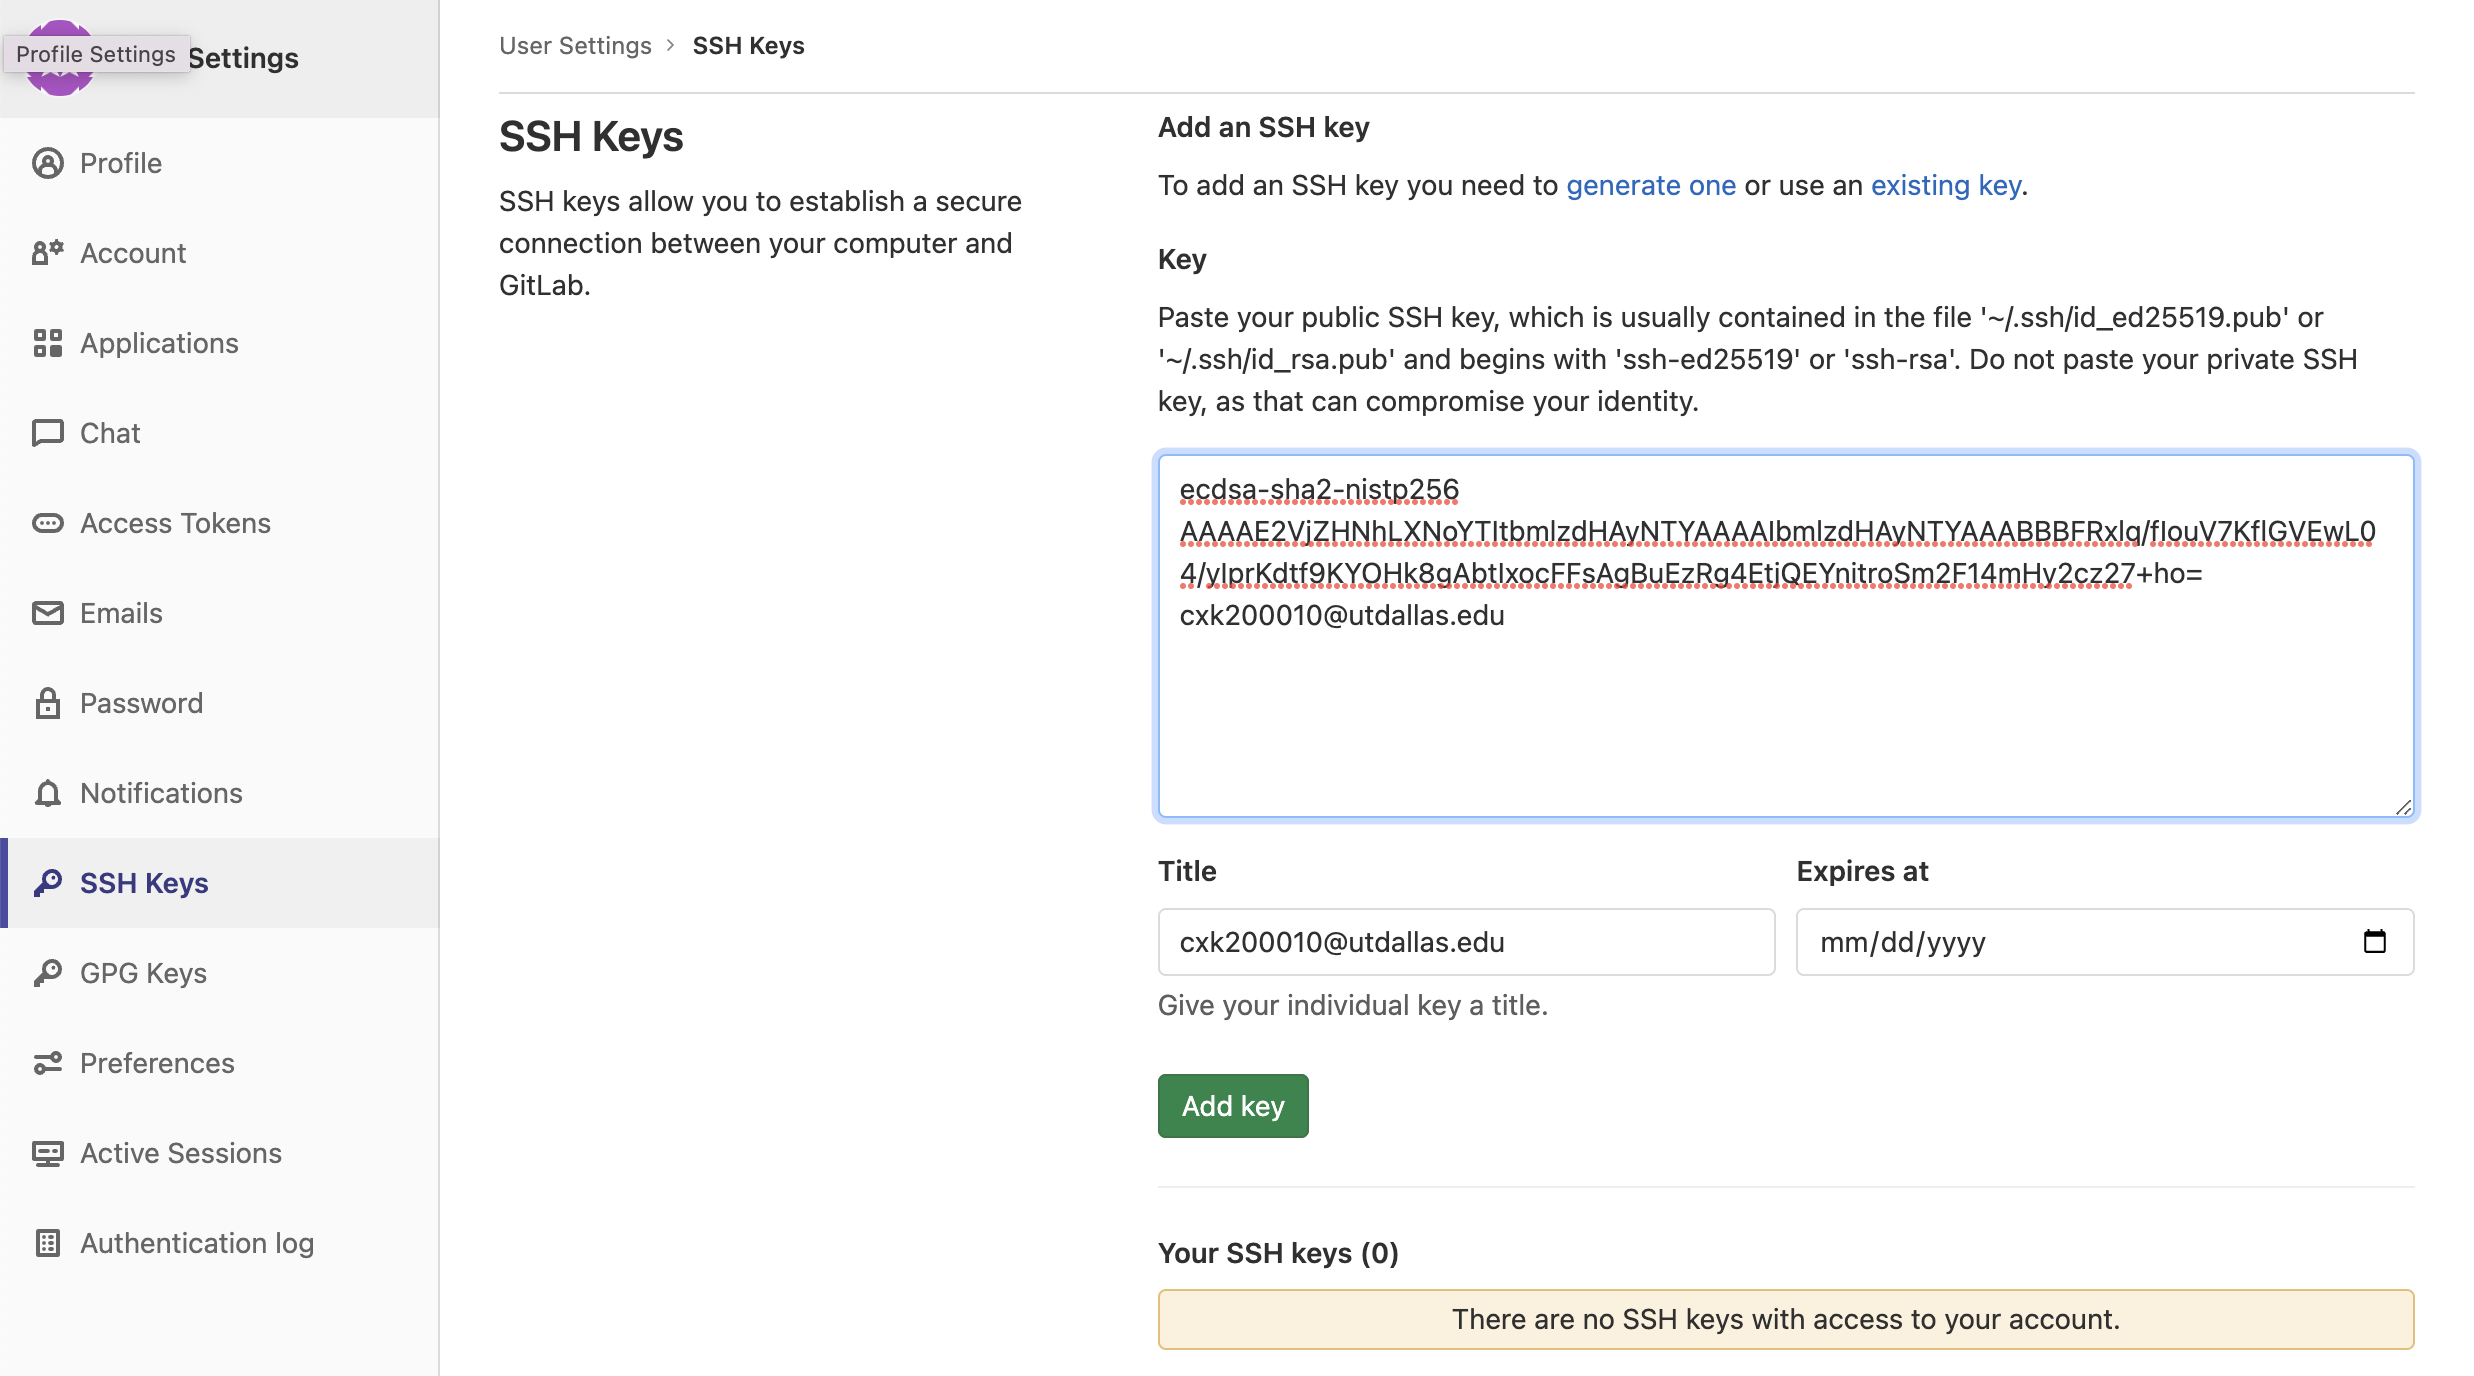
Click SSH Keys from the settings menu on the left.
Then, please copy the content of SSH public key (a string starts with ssh-rsa, ssh-ecdsa, or ssh-ed25519, etc.) that you already have or just created in the previous step.
After that, paste your public key in the 'Key' field. And you can add your ssh-public key.

Forking the projects
After registering yourself to the GitLab, you can 'fork' the projects as your repository. To do this, please visit the projects repository at http://s3lab.utdallas.edu/instructor/infosec and click 'fork'.
Cloning the projects
# in server, clone the repository
$ git clone ssh://git@s3lab.utdallas.edu:2224/NetID/infosec.git
Cloning into infosec...
$ cd infosec
You must change NetID part to your NetID, for example, my NetID is cxk200010, then:
# in server, clone the repository
$ git clone ssh://git@s3lab.utdallas.edu:2224/cxk200010/infosec.git
Cloning into infosec...
$ cd infosec
To commit and push to the repository, you may want to setup your git information by running the following commands (if you have not done this before...). Make sure to update the NetID and YourName parts:
$ git config --global user.email "NetID@utdallas.edu"
$ git config --global user.name "YourName"
$ git config --global core.editor /usr/bin/vim
$ git config --global push.default simple
$ git config --global pull.rebase false
$ git config --global core.autocrlf false
Updating your student.info file
After having forked and cloned your repository, your first task to finish is to update the student.info file in your repository. Please fill the information (your NetID, name, and your class section) in the file.
The reason why we collect such information is to match your repository to your account at UTD (to collect and record your scores).
NetID        : cxk200010
Name         : Chung Hwan Kim
Class Section: cs6324.001
Right now, it has some placeholder information, and please change it to your information. After making changes, you can make it accessible on our GitLab server by doing add, commit, and push. You can do that by running the follwing commands:
$ git status

... see that your student.info is edited

$ git add -A
$ git commit

.. write some commit messages in the editor

$ git push

.. this will push the change in the remote server (our GitLab server)
After pushing your changes, you can verify if that is available remotely by visiting your repository website on our GitLab server.
Running the setup script
Next, please run the setup script for the projects. The script is located at:
/usr/local/bin/lab-setup
$ /usr/local/bin/lab-setup
Cloning into '/home/cxk200010/.lab'...
remote: Enumerating objects: 502, done.
remote: Counting objects: 100% (19/19), done.
remote: Compressing objects: 100% (12/12), done.
remote: Total 502 (delta 8), reused 14 (delta 6), pack-reused 483
Receiving objects: 100% (502/502), 18.23 MiB | 22.14 MiB/s, done.
Resolving deltas: 100% (299/299), done.


Do you want to install gdb-dashboard and peda (disabled by default) to ~/.gdbinit (y/n)?
y
Do you want to install lab custom tmux configuration (y/n)?
y
Do you want to install .vimrc and vim plugins (y/n)?
y
Error detected while processing /home/instructor/.vimrc:
line   20:
E185: Cannot find color scheme 'angr'
Press ENTER or type command to continue
The script will clone the prepared environmental scripts (.dotfiles) and setup bash, ssh, gdb, tmux, and vim.
If you wish to use the prepared dotfiles by CS 6324 staff, then please type 'y' at each question from the script. In this case, all your existing dotfiles will be saved as .dotfile_name.bak, e.g., .vimrc.bak in your home directory.
If you wish to keep your settings for any of them, please type 'n' for the corresponding question.